iThis page describes how to create and run the control loops for the "Hello World" O-RU Fronthaul Recovery usecase. This can be done either in docker environment using docker-compose files (available in the nonrtric repo of OSC), or in kubernetes environment using the complete ONAP installation done via OOM. Moreover, the control loop for apex policy version of the usecase can be created using Policy participant, whereas the control loop for script version of the usecase can be created using Kubernetes participant (both participants available in policy/clamp repo of ONAP).
Control loops in kubernetes
This section is related to running the control loops in a kubernetes environment. Specifically, it describes how to deploy the control loops in a full-fledge installation of ONAP assuming that the installation was done in a cluster using 'istanbul' branch of OOM.
Firstly, the common steps for creating control loops for both apex policy and script versions of the usecase are described. This is followed by the steps that are unique for setting up and testing each version individually.
Create topic in DmaaP MR
In order to create the fault notification topic in DMaaP Message Router, the first step is to find out its NodePort and NodeIP. The NodeIP is the IP address of any k8s node in the cluster where ONAP has been installed, and it can be found using the command "kubectl get nodes -o wide". The NodePort can be found using the command "kubectl -n onap get svc | grep message-router-external". Next, the topic defined for this usecase can be created using:
curl -k -X POST -H "Content-Type: application/json" -d "{"topicName": "unauthenticated.SEC_FAULT_OUTPUT"}" https://<NodeIP>:<NodePort-message-router>/events/unauthenticated.SEC_FAULT_OUTPUT
Run Policy GUI
The easiest way to create the control loops is via Policy GUI component of the clamp. The below steps describe how to start this GUI.
NOTE: At the time of writing this page (15 Dec 2021), there is a bug in the helm chart of policy/clamp in 'istanbul' branch of OOM. The bug should be fixed by the policy/clamp team. Until then, the following steps should be done to fix this problem. Run the command:
kubectl -n onap edit cm def-policy-clamp-be-configmap
(whereas "def" refers to the name of deployment and should be replaced with the name used when installing ONAP. The same should be done for all instructions given below that use "def" as deployment name)
and change http to https in clamp.config.controlloop.runtime.url under application.properties. Then, run this command:
kubectl rollout restart deployment def-policy-clamp-be
Next step is to find out the NodePort of policy-guy. This can be done by using the command "kubectl -n onap get svc | grep policy-gui".
Then, open a web browser and navigate to the url:
https://<NodeIP>:<NodePort-policy-gui>/clamp/
Use below credentials for the GUI:
username: demo@people.osaaf.org. password: demo123456!
Start-up screen of the Policy GUI
Commission/Instantiate control loop via GUI
This sub-section shows how to commission and instantiate the control loops via policy-gui. The individual tosca templates for each of the apex policy and script versions are provided below in the relevant sub-sections. The screenshots shown in this sub-section are general steps that are applicable for both versions.
Go to Tosca Control Loop pane, and select Upload Tosca to Commissioning in order to upload the tosca template (provided later in the relevant sub-section).
Upload tosca template for commissioning
Tosca template uploaded successfully
After commissioning the tosca template, the next step is to instantiate the control loop. Go to Tosca Control Loop pane, and select Instantiation Management and then press the Create Instance button. If no changes need to be made in the instance properties, press the Save button and it should show a message depicting that the instantiation operation was successful.

Instantiate the control loop
Create Instance dialog
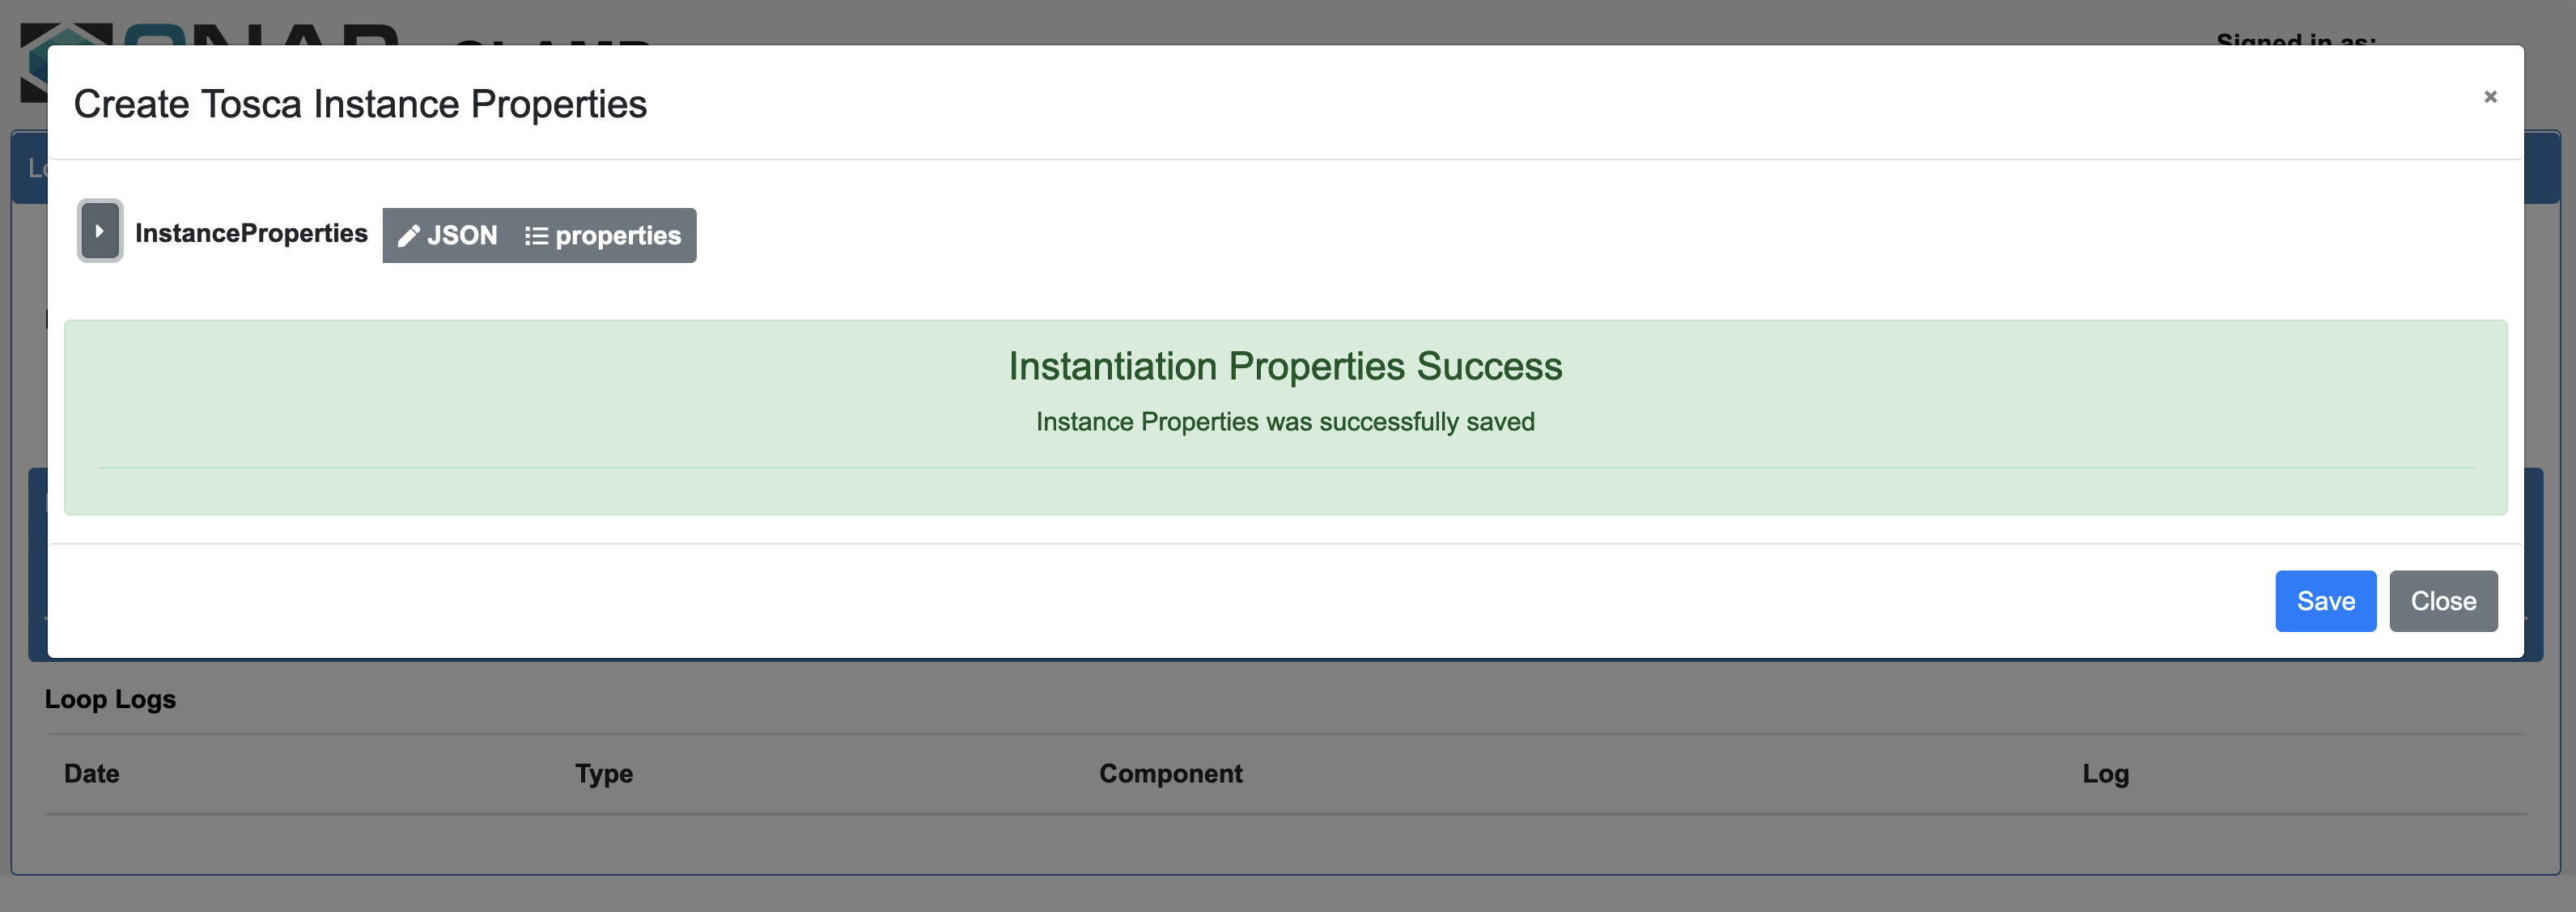
Instantiation properties saved successfully
Go back again to Instantiation Management under Tosca Control Loop pane, and the newly created control loop instance in UNINITIALISED state will pop up. If nothing shows up, refresh the web browser and try again.
Newly created control loop instance in UNINITIALISED state
NOTE: There is a bug in the istanbul version of policy/clamp that each control loop instance is named as PMSH_Instance1. This should be fixed by the clamp team, however it can be ignored if the instance name is not important for the user.
Press the Change button under Change State Order. Then, press the Select Order State drop-down menu, and select PASSIVE. Finally, press the Save button to change the control loop to PASSIVE state.
Changing the control loop to PASSIVE state
State changed successfully
Control loop changed to PASSIVE state
In a similar way, change the control loop state to RUNNING.
Control loop changed to RUNNING state
Once the control loop gets into the RUNNING state, the corresponding version of the usecase should be up and running.
In order to delete the control loop instance, it should be first changed back to PASSIVE state and then to UNINITIALISED state. Once the instance shows PASSIVE under Instantiation Current State, press the Delete button under Delete Instantiation.
Control loop instance deleted
After deleting the control loop instance, the tosca template can be decommissioned as follows.
Go to Tosca Control Loop pane, and select Manage Commissioned Tosca Template.
Manage commissioned tosca template
Press the button Pull Tosca Service Template and it should show the commissioned tosca template. Once the template shows up, press the Delete Tosca Service Template button. This will be followed by a "Delete Successful" message.
Deleting the commissioned tosca template
Tosca template deleted successfully
NOTE: There is a limitation in the istanbul version of policy/clamp that only one tosca template can be commissioned at a time. So, always delete the currently commissioned template before trying a new one.
Apex Policy version
This version is run in the stand-alone ONAP policy framework and uses an apex policy.
Assumption:
It is assumed that the DMaaP Message Router is already running as a docker container with the hostname "onap-dmaap" and connected to the docker network named "nonrtric-docker-net". It is also assumed that a topic named "unauthenticated.SEC_FAULT_OUTPUT" has already been created in the Message Router.
Start the ONAP Policy framework
The ONAP Policy framework can be run in a stand-alone mode using the docker-compose in OSC nonrtric repo:
git clone "https://gerrit.o-ran-sc.org/r/nonrtric"
git checkout e-release --track origin/e-release
cd nonrtric/docker-compose/docker-compose-policy-framework
Start all the containers by running this command:
docker-compose up -d