Scope
FlexRAN is a vRAN reference implementation for virtualized cloud-enabled radio access networks. FlexRAN is not an open-source project. It is provided here as an example of a 5G application running on INF.
This document provides details on how to build FlexRAN software for INF, generate a containerized version of the prebuilt FlexRAN binaries, and deploy on INF solution.
Note:
The steps in this guide are based on FlexRAN 22.03. The instructions are subject to change in future releases of FlexRAN.
And only CentOS based INF image is verified.
Intended Audience
The intended audience for this document are software engineers and system architects who want to design and develop 5G systems using the O-RAN Specifications based on FlexRAN and INF platform.
INF AIO Simplex Installation
S1 Prepare USB stick with INF CentOS based Installation ISO
S1.1 Get INF CentOS based Installation ISO from following location:
S1.2 - Burn the image to a USB stick:
Be sure to use the correct USB device name when copying the image.
dd if=inf-image-centos-all-x86-64.iso of=/dev/sdc bs=1M
S2 Follow the installation guide
In addition to the Hardware Requirements for INF (INF is a downstream project of StarlingX, and the requirements are the same as StarlingX), you will need the following hardware for FlexRAN applications.
Minimum Requirement | All-in-one Controller Node |
|---|---|
Minimum processor class | Single-CPU Intel Xeon Cascade Lake (14 nm) or IceLake (10 nm) |
Minimum memory | 64 GB single socket |
Minimum network ports | OAM: 1x1GE, If only test timer mode, no other NIC required. |
BIOS settings |
|
Accelerator Card | Mt. Bryce ACC100 (Intel eASIC chip which can be mounted on third party card) |
The FlexRAN application on INF has been tested on Intel Reference Hardware platform: Coyote Pass (housing ICX-SP).
Note
Some third-party platforms like SuperMicro / HPE / Dell / Quanta / and others can also be used depending on customer platform requirements, certain optimizations for low-latency and power savings mode by the platform vendors.
S2.1 Please follow this installation guide:
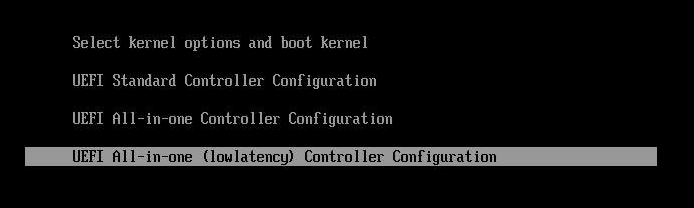
- Install Kubernetes Platform on All-in-one Simplex:
- When install controller-0 from the image, please select ‘All-in-one (lowlatency) Controller Configuration’
S2.2 In addition to required StarlingX configuration, you must set up the Ceph backend for Kubernetes PVC, isolcpus and hugepages:
source /etc/platform/openrc

NODE=controller-0
OAM_IF=<OAM-PORT>

# if you use flat oam network
system host-if-modify ${NODE} $OAM_IF -c platform
system interface-network-assign ${NODE} $OAM_IF oam

# if you use vlan oam network
VLANID=<VLAN-ID>
system host-if-modify -n pltif -c platform $NODE $OAM_IF
system host-if-add ${NODE} -V $VLANID -c platform oam0 vlan pltif
system interface-network-assign ${NODE} oam0 oam

system host-label-assign $NODE sriovdp=enabled
system host-label-assign $NODE kube-topology-mgr-policy=restricted

# Ceph backend for k8s pvc
system storage-backend-add ceph --confirmed
system host-disk-list ${NODE} | awk '/\/dev\/sdb/{print $2}' | xargs -i system host-stor-add ${NODE} {}

# isolate cpus depends on number of the physical core
system host-cpu-modify -f application-isolated -p0 28 $NODE

# allocate/enable hugepages for DPDK usage
system host-memory-modify $NODE -1G 10 0

system host-unlock $NODE
S2.3 After the system has been unlocked and available for the first time, configure ACC100 / Mount Bryce:
source /etc/platform/openrc

NODE=controller-0
system host-lock $NODE

# get the device name of the Mount Bryce, we assume it is
# pci_0000_8a_00_0 here.
system host-device-list $NODE

# Modify the Mount Bryce device to enable it, specify the base driver
# and vf driver, and configure it for 1 VFs

# NOTE: If this is the initial install and have not unlocked, you will
# get following error message.
# Cannot configure device 73b13ddf-99be-44c8-8fbe-db85eb8d99ba until host
# controller-0 is unlocked for the first time.
system host-device-modify $NODE pci_0000_8a_00_0 -e true --driver igb_uio --vf-driver vfio -N 1

system host-unlock $NODE
FlexRAN Software Prerequisites
FlexRAN 22.03 Release Package
FlexRAN Software Wireless Access Solutions is available from the following page: https://www.intel.com/content/www/us/en/developer/topic-technology/edge-5g/tools/flexran.html
FlexRAN DPDK BBDEV v22.03 Patch
This patch file is also available in FlexRAN Software Wireless Access Solutions mentioned above.
DPDK version 21.11
DPDK version 21.11 is available in http://static.dpdk.org/rel/dpdk-21.11.tar.xz
Intel oneAPI Compiler
The Intel oneAPI Compiler is used to compile Intel DPDK and L1 software. The Intel oneAPI Compiler can be obtained using the following link: https://www.intel.com/content/www/us/en/developer/tools/oneapi/base-toolkit-download.html
Build, Deploy and Run FlexRAN
Generally speaking, the build and execution environments should not be the same. To facilitate building, deploying, and running the process on INF, a custom containerized build environment has been prepared and verified. Developers can use the instructions to build the customized Docker image themselves or use the prebuilt Docker image directly.
Using this method, developers can:
Start the build soon after INF is ready.
Use the scripts provided to generate a Docker image with pre-built FlexRAN binaries.
Launch the FlexRAN Pod using the image just generated.
Execute L1 test cases.
The following procedures provide detailed instructions for completing the stages described above.
S3 FlexRAN build preparation
For details, see:
https://www.intel.com/content/www/us/en/developer/topic-technology/edge-5g/tools/flexran.html
You can find build instructions in the Compilation Chapter of FlexRAN 5GNR Reference Solution 22.03.
The following steps provide a quick-start procedure for developers.
S3.1 Create a PVC for FlexRAN build storage:
Note: The PVC size should be larger than 70G.
cat >  volume-ceph.yaml << 'EOF'
kind: PersistentVolumeClaim
apiVersion: v1
metadata:
  name: flexran-storage
spec:
  accessModes:
    - ReadWriteOnce
  resources:
    requests:
      storage: 80Gi
  storageClassName: general
EOF

controller-0:~$ kubectl create -f volume-ceph.yaml
persistentvolumeclaim/flexran-storage created
controller-0:~$ kubectl get pvc
NAME              STATUS   VOLUME                                     CAPACITY   ACCESS MODES   STORAGECLASS   AGE
flexran-storage   Bound    pvc-43e50806-785f-440b-8ed2-85bb3c9e8f79   80Gi       RWO            general        9s
S3.2 Instructions for FlexRAN building image creation
mkdir dockerbuilder && cd dockerbuilder

# prepare the artifacts used for FlexRAN prebuilt binary Docker image
mkdir docker-image-building
cat >  docker-image-building/readme << 'EOF'
# Instructions of Docker image generation

# Following steps are supposed to be executed inside building Pod,
# after building FlexRAN from source code

flxr_install_dir=/opt/fb/flexran/

# populate flexran related env var
cd ${flxr_install_dir}
source set_env_var.sh -d

# prepare the FlexRAN binaries
./transport.sh

# build the Docker image
docker build -t flr-run -f Dockerfile .

# tag and push
orgname=somename
docker tag flr-run ${orgname}/flr-run

EOF

cat >  docker-image-building/transport.sh << 'EOF'
#!/bin/bash

# ICXPATH=/opt/fb/intel/oneapi/

echo "Make sure source setvars.sh first.(located in ICX oneapi installation directory)"
echo "Make sure source set_env_var.sh -d first.(located in FlexRAN installation directory)"

[[ -z "$MKLROOT" ]] && { echo "MKLROOT not set, exit..."; exit 1; }
[[ -z "$IPPROOT" ]] && { echo "MKLROOT not set, exit..."; exit 1; }
[[ -z "$CMPLR_ROOT" ]] && { echo "MKLROOT not set, exit..."; exit 1; }
[[ -z "$DIR_WIRELESS_SDK_ROOT" ]] && { echo "DIR_WIRELESS_SDK_ROOT not set, exit..."; exit 1; }

FLXPATH=`echo $DIR_WIRELESS_SDK_ROOT| awk -F '/sdk' '{print $1}'`

[[ -d stuff ]] && { echo "Directory stuff exists, move it to old."; mv -f stuff stuff.old; }

mkdir stuff; cd stuff

mkdir libs
cp -a $MKLROOT/lib/intel64/libmkl_intel_lp64.so* libs
cp -a $MKLROOT/lib/intel64/libmkl_core.so* libs
cp -a $MKLROOT/lib/intel64/libmkl_intel_thread.so* libs
cp -a $MKLROOT/lib/intel64/libmkl_avx512.so.* libs
cp -a $MKLROOT/lib/intel64/libmkl_avx2.so* libs
cp -a $MKLROOT/lib/intel64/libmkl_avx.so* libs

cp -a $IPPROOT/lib/intel64/libipps.so* libs
cp -a $IPPROOT/lib/intel64/libippe.so* libs
cp -a $IPPROOT/lib/intel64/libippcore.so* libs
cp -a $IPPROOT/lib/intel64/libippee9.so* libs
cp -a $IPPROOT/lib/intel64/libippse9.so* libs

cp -a $CMPLR_ROOT/linux/compiler/lib/intel64_lin/libiomp5.so* libs
cp -a $CMPLR_ROOT/linux/compiler/lib/intel64_lin/libirc.so* libs
cp -a $CMPLR_ROOT/linux/compiler/lib/intel64_lin/libimf.so* libs
cp -a $CMPLR_ROOT/linux/compiler/lib/intel64_lin/libsvml.so* libs
cp -a $CMPLR_ROOT/linux/compiler/lib/intel64_lin/libintlc.so* libs
cp -a $CMPLR_ROOT/linux/compiler/lib/intel64_lin/libirng.so* libs

cp -a $FLXPATH/libs/cpa/bin/libmmwcpadrv.so* libs
cp -a $FLXPATH/wls_mod/libwls.so* libs

mkdir -p flexran/sdk/build-avx512-icx/
cp -rf $FLXPATH/sdk/build-avx512-icx/source flexran/sdk/build-avx512-icx/
cp -rf $FLXPATH/sdk/build-avx512-icx/install flexran/sdk/build-avx512-icx/
cp -rf $FLXPATH/bin flexran/
cp -rf $FLXPATH/set_env_var.sh flexran/

# testcase files
mkdir -p tests/nr5g/
cd tests/nr5g/
for cfg in $FLXPATH/bin/nr5g/gnb/testmac/icelake-sp/*.cfg
do
  cat $cfg | grep TEST_FD > /tmp/$$.testfile
  while IFS= read line
  do
    array=($(echo "$line" | sed 's/5GNR,/ /g'))
    for i in "${array[@]}"; do
      if [[ "$i" =~ \.cfg ]]; then
        casedir=`echo "$i"| cut -d / -f 1-3 | xargs`
        caseabsdir=$FLXPATH/tests/nr5g/$casedir
        [[ ! -d $casedir ]] && { mkdir -p $casedir; cp -rf $caseabsdir/* $casedir; }
      fi
    done
  done < /tmp/$$.testfile
done

echo "Transportation Completed."
EOF

chmod a+x docker-image-building/transport.sh

cat >  docker-image-building/set-l1-env.sh << 'EOF'
# source this script to l1 binary location

export WORKSPACE=/root/flexran
export isa=avx512

cd $WORKSPACE
source ./set_env_var.sh -i ${isa}

MODE=$1
[[ -z "$MODE" ]] && read -p "Enter the MODE(LTE or 5G): " MODE

if [ $MODE = LTE ]; then
  cd $WORKSPACE/bin/lte/l1/
fi
if [ $MODE = 5G ]; then
  cd $WORKSPACE/bin/nr5g/gnb/l1
fi
EOF

cat >  docker-image-building/set-l2-env.sh << 'EOF'
# source this script to l2 binary location

export WORKSPACE=/root/flexran
export isa=avx512

cd $WORKSPACE
source ./set_env_var.sh -i ${isa}

MODE=$1
[[ -z "$MODE" ]] && read -p "Enter the MODE(LTE or 5G): " MODE

if [ $MODE = LTE ]; then
  cd $WORKSPACE/bin/lte/testmac/
fi
if [ $MODE = 5G ]; then
  cd $WORKSPACE/bin/nr5g/gnb/testmac
fi
EOF

cat >  docker-image-building/res-setup.sh << 'EOF'
#!/bin/bash

[[ -z "$PCIDEVICE_INTEL_COM_INTEL_ACC100_FEC" ]] && { echo "ACC100 not used, sleep..."; sleep infinity; }

sed -i 's#.*dpdkBasebandFecMode.*#        <dpdkBasebandFecMode\>1</dpdkBasebandFecMode>#' /root/flexran/bin/nr5g/gnb/l1/phycfg_timer.xml
sed -i 's#.*dpdkBasebandDevice.*#        <dpdkBasebandDevice\>'"$PCIDEVICE_INTEL_COM_INTEL_ACC100_FEC"'</dpdkBasebandDevice>#' /root/flexran/bin/nr5g/gnb/l1/phycfg_timer.xml

echo "Resource setup Completed, sleep..."
sleep infinity
EOF

chmod a+x docker-image-building/res-setup.sh

mkdir docker-image-building/rootdir
mv docker-image-building/res-setup.sh docker-image-building/rootdir
mv docker-image-building/set-l1-env.sh docker-image-building/rootdir
mv docker-image-building/set-l2-env.sh docker-image-building/rootdir

cat >  docker-image-building/Dockerfile << 'EOF'
FROM centos:7.9.2009

RUN [ -e /etc/yum.conf ] && sed -i '/tsflags=nodocs/d' /etc/yum.conf || true

RUN yum install -y libhugetlbfs* libstdc++* numa* gcc g++ iproute \
           module-init-tools kmod pciutils python libaio libaio-devel \
           numactl-devel nettools ethtool
RUN yum clean all

COPY stuff/libs/* /usr/lib64/

WORKDIR /root/
COPY stuff/flexran ./flexran
COPY stuff/tests ./flexran/tests
COPY rootdir/* ./

CMD ["/root/res-setup.sh"]
EOF

cat >  Dockerfile << 'EOF'
FROM centos:7.9.2009

RUN [ -e /etc/yum.conf ] && sed -i '/tsflags=nodocs/d' /etc/yum.conf || true

RUN yum groupinstall -y 'Development Tools'

RUN yum install -y vim gcc-c++ libhugetlbfs* libstdc++* kernel-devel numa* gcc git mlocate \
           cmake wget ncurses-devel hmaccalc zlib-devel binutils-devel elfutils-libelf-devel \
           numactl-devel libhugetlbfs-devel bc patch git patch tar zip unzip python3 sudo docker

RUN yum install -y gtk3 mesa-libgbm at-spi2-core libdrm xdg-utils libxcb libnotify

RUN yum install -y centos-release-scl
RUN yum install -y devtoolset-8

RUN yum clean all

RUN pip3 install meson && \
    pip3 install ninja pyelftools

# ENV HTTP_PROXY=""
# ENV HTTPS_PROXY=""

WORKDIR /usr/src/
RUN git clone https://github.com/pkgconf/pkgconf.git
WORKDIR /usr/src/pkgconf
RUN ./autogen.sh && ./configure && make && make install

WORKDIR /usr/src/
RUN git clone git://git.kernel.org/pub/scm/utils/rt-tests/rt-tests.git
WORKDIR /usr/src/rt-tests
RUN git checkout stable/v1.0
RUN make all && make install

COPY docker-image-building /root/docker-image-building

WORKDIR /opt

# Set default command
CMD ["/usr/bin/bash"]
EOF

# build the Docker image for FlexRAN building environment
sudo docker build -t flexran-builder .
sudo docker tag flexran-builder registry.local:9001/flexran-builder:22.03

# push to registry.local:9001
sudo docker login registry.local:9001 -u admin -p <your_sysadmin_passwd>
sudo docker push registry.local:9001/flexran-builder:22.03
S3.3 Launch the building pod attaching to the PVC:
Note: This pod is assumed to be assigned enough resources to launch quickly after FlexRAN is built. If you don’t have isolated CPU, hugepage and accelerator resources configured as part of the system used for building, feel free to remove related content from the yaml spec file. Hugepages-1Gi and intel.com/intel_acc100_fec are not required to perform the build.cat > flexran-buildpod.yml << 'EOF'
apiVersion: v1
kind: Pod
metadata:
name: buildpod
annotations:
spec:
restartPolicy: Never
containers:
- name: buildpod
image: registry.local:9001/flexran-builder:22.03
imagePullPolicy: IfNotPresent
volumeMounts:
- name: usrsrc
mountPath: /usr/src
- mountPath: /hugepages
name: hugepage
- name: lib-modules
mountPath: /lib/modules
- name: pvc1
mountPath: /opt/fb
- name: docker-sock-volume
mountPath: /var/run/docker.sock
command: ["/bin/bash", "-ec", "sleep infinity"]
securityContext:
privileged: true
capabilities:
add:
["IPC_LOCK", "SYS_ADMIN"]
resources:
requests:
memory: 32Gi
hugepages-1Gi: 10Gi
intel.com/intel_acc100_fec: '1'
limits:
memory: 32Gi
intel.com/intel_acc100_fec: '1'
hugepages-1Gi: 10Gi
volumes:
- name: usrsrc
hostPath:
path: /usr/src
- name: lib-modules
hostPath:
path: /lib/modules
- name: hugepage
emptyDir:
medium: HugePages
- name: docker-sock-volume
hostPath:
path: /var/run/docker.sock
type: Socket
- name: pvc1
persistentVolumeClaim:
claimName: flexran-storage
EOF
kubectl create -f flexran-buildpod.yml
S4 Build FlexRAN in Pod
S4.1 Use a shell inside Pod to build FlexRAN:
kubectl exec -it buildpod -- bash
S4.2 Usescp to copy the FlexRAN related files into the pod’s PVC:
mkdir -p /opt/fb/scratch && cd /opt/fb/scratch
scp <options> FlexRAN-22.03-L1.tar.gz_part00 .
scp <options> FlexRAN-22.03-L1.tar.gz_part01 .
scp <options> dpdk_patch-22.03.patch .

cat FlexRAN-22.03-L1.tar.gz_part00 FlexRAN-22.03-L1.tar.gz_part01 > FlexRAN-22.03-L1.tar.gz
rm FlexRAN-22.03-L1.tar.gz_part00
rm FlexRAN-22.03-L1.tar.gz_part01
S4.3 Copy DPDK source code into the pod’s PVC
cd /opt && wget http://static.dpdk.org/rel/dpdk-21.11.tar.xz
tar xf dpdk-21.11.tar.xz
mv dpdk-21.11/ /opt/fb/dpdk-flxr-22.03
cd /opt/fb/dpdk-flxr-22.03
patch -p1 < /opt/fb/scratch/dpdk_patch-22.03.patch
S4.4 Install oneAPI (ICX) Compiler
cd /opt/fb/scratch/

wget https://registrationcenter-download.intel.com/akdlm/irc_nas/18487/l_BaseKit_p_2022.1.2.146_offline.sh
chmod a+x l_BaseKit_p_2022.1.2.146_offline.sh

./l_BaseKit_p_2022.1.2.146_offline.sh -a -s --eula accept --install-dir /opt/fb/intel/oneapi
S4.5 Extract FlexRAN and populate the environment variables
cd /opt/fb/scratch/ && tar zxvf FlexRAN-22.03-L1.tar.gz && ./extract.sh
# input '/opt/fb/flexran' for Extract destination directory

cd /opt/fb/flexran/

TARGET_COMPILER=icx

source ./set_env_var.sh -d
# When following promote message shows:
# Enter One API Install Directory for icx, or just enter to set default
# input: /opt/fb/intel/oneapi
# promote message shows:
#     Enter DPDK Install Directory, or just enter to set default
# input: /opt/fb/dpdk-flxr-22.03
S4.6 Switch to devtoolset-8 environment
scl enable devtoolset-8 bash
or
source /opt/rh/devtoolset-8/enable
S4.7 Build FlexRAN SDK
cd /opt/fb/flexran && ./flexran_build.sh -e -r 5gnr -m sdk
S4.8 Build DPDK with the FlexRAN patch
cd /opt/fb/dpdk-flxr-22.03 && meson build
cd /opt/fb/dpdk-flxr-22.03/build && meson configure

pip3 install pyelftools

work_path=/opt/fb/flexran/sdk/build-avx512-icx/install && ninja
S4.9 Build the FlexRAN applications
cd /opt/fb/flexran

# compile all available modules for 5gnr
./flexran_build.sh -e -r 5gnr
S5 Generate Docker image with FlexRAN binaries
Note: Since host path/var/run/docker.sock has been mounted into the building pod, you can build the Docker image using the FlexRAN binaries from the previous step inside the building pod. The artifacts used by docker build have been integrated into the build image and are ready to use.
S5.1 Prepare the env var for the script in /root/docker-image-building/transport.sh:
source /opt/fb/intel/oneapi/setvars.sh
cd /opt/fb/flexran && source ./set_env_var.sh -d
S5.2 Prepare binaries and scripts for Docker build:
cd /root/docker-image-building
./transport.sh
S5.3 Build Docker image which will be saved in local host:
docker build -t flr-run -f Dockerfile .
S6 Run the FlexRAN Test cases in Pod
After the build and Docker image generation steps above, you can launch the FlexRAN execution pod from the host.
S6.1 Push the Docker image to registry.local:9001
# change to host side, in this case, it should be controller-0 host
sudo docker login registry.local:9001 -u admin -p <your_sysadmin_passwd>
sudo docker tag flr-run registry.local:9001/flxrun:22.03
sudo docker push registry.local:9001/flxrun:22.03
S6.2 Launch the FlexRAN Pod.
Adjust the CPU and memory for your configuration. Memory should be more than 32Gi for the test case pass rate.
Note: command should not be used in the spec, otherwise it will overwrite the default container command which does accelerator PCI address filling for L1.
cat > runpod-flxr.yml << 'EOF'
apiVersion: v1
kind: Pod
metadata:
  name: runpod
  annotations:
spec:
  restartPolicy: Never
  containers:
  - name: runpod
    image: registry.local:9001/flxrun:22.03
    imagePullPolicy: IfNotPresent
    volumeMounts:
    - mountPath: /hugepages
      name: hugepage
    securityContext:
      privileged: false
      capabilities:
        add:
          ["IPC_LOCK", "SYS_ADMIN", "SYS_NICE"]
    resources:
      requests:
        memory: 32Gi
        hugepages-1Gi: 6Gi
        intel.com/intel_acc100_fec: '1'
      limits:
        memory: 32Gi
        hugepages-1Gi: 6Gi
        intel.com/intel_acc100_fec: '1'
  volumes:
  - name: hugepage
    emptyDir:
        medium: HugePages
EOF

kubectl create -f runpod-flxr.yml
S6.3 Execute L1.
S6.3.1 Enter the L1 directory inside Pod:
kubectl exec -it runpod -- bash
source set-l1-env.sh 5G
S6.3.2 Edit L1 configuration file:
phycfg_timer.xml has been modified by entry script to use the FEC accelerator: <dpdkBasebandFecMode>1</dpdkBasebandFecMode> <dpdkBasebandDevice>0000:8b:00.0</dpdkBasebandDevice>
This configuration is scripted and runs automatically, no manual configuration is needed. You can use printenv PCIDEVICE_INTEL_COM_INTEL_ACC100_FEC to check dpdkBasebandDevice.
# change default CPU binding in section of <Threads> in phycfg_timer.xml
# use the first 3 assigned CPUs for the Applications threads

<!-- CPU Binding to Application Threads -->
    <Threads>
        <!-- System Threads (Single core id value): Core, priority, Policy [0: SCHED_FIFO 1: SCHED_RR] -->
        <systemThread>2, 0, 0</systemThread>

        <!-- Timer Thread (Single core id value): Core, priority, Policy [0: SCHED_FIFO 1: SCHED_RR] -->
        <timerThread>3, 96, 0</timerThread>

        <!-- FPGA for LDPC Thread (Single core id value): Core, priority, Policy [0: SCHED_FIFO 1: SCHED_RR] -->
        <FpgaDriverCpuInfo>4, 96, 0</FpgaDriverCpuInfo>

        <!-- FPGA for Front Haul (FFT / IFFT) Thread (Single core id value): Core, priority, Policy [0: SCHED_FIFO 1: SCHED_RR] -->
        <!-- This thread should be created for timer mode and hence can be same core as LDPC polling core -->
        <FrontHaulCpuInfo>4, 96, 0</FrontHaulCpuInfo>

        <!-- DPDK Radio Master Thread (Single core id value): Core, priority, Policy [0: SCHED_FIFO 1: SCHED_RR] -->
        <radioDpdkMaster>2, 99, 0</radioDpdkMaster>
    </Threads>
S6.3.3 Run L1 application:
# launch L1app
./l1.sh -e
S6.4 Execute testmac after L1 is up and running in another terminal.
S6.4.1 Enter the testmac directory inside Pod:
kubectl exec -it runpod -- bash
source set-l2-env.sh 5G
S6.4.2 Edit testmac configuration file:
# Modify default CPU binding in section of <Threads> in testmac_cfg.xml
# Make sure to use the CPU from the CPU whose ID is bigger than 13,
# this way, the Application Threads will not overlap with the BBUPool CPUs.
<!-- CPU Binding to Application Threads -->
    <Threads>
        <!-- Wireless Subsystem Thread: Core, priority, Policy [0: SCHED_FIFO 1: SCHED_RR] -->
        <wlsRxThread>16, 90, 0</wlsRxThread>

        <!-- System Threads: Core, priority, Policy [0: SCHED_FIFO 1: SCHED_RR] -->
        <systemThread>14, 0, 0</systemThread>

        <!-- TestMac Run Thread: Core, priority, Policy [0: SCHED_FIFO 1: SCHED_RR] -->
        <runThread>14, 89, 0</runThread>

        <!-- Thread to send / receive URLLC APIS to / from testmac to Phy. It will be created only when the phy_config has URLLC Support added to it: Core, priority, Policy [0: SCHED_FIFO 1: SCHED_RR] -->
        <urllcThread>15, 90, 0</urllcThread>
    </Threads>

# workaround the known issue of parsing zero value in the config file
sed -i '/>0</d' testmac_cfg.xml
S6.4.3 Run testmac application:
# launch testmac
./l2.sh --testfile=icelake-sp/icxsp_mu1_100mhz_mmimo_64x64_16stream_hton.cfg

# Note, case of 3389 is the most stringent case, we can comment out
# other cases in the file and run this case directly:
# TEST_FD, 3389, 3, 5GNR, fd/mu1_100mhz/383/fd_testconfig_tst383.cfg,
# 5GNR, fd/mu1_100mhz/386/fd_testconfig_tst386.cfg,
# 5GNR, fd/mu1_100mhz/386/fd_testconfig_tst386.cfg
Note:
For detailed explanation of the XML configuration used by L1, refer to the FlexRAN documentation available at: https://www.intel.com/content/www/us/en/developer/topic-technology/edge-5g/tools/flexran.html